Note: Use of CIP Client version matching your CIP Web Application version is recommended.
To start the client installation
1.Run the CadenceOrCADCIPClient23.1Setup.exe installer.

CIP Client Install Welcome
3.Read the license agreement and click I accept before continuing with the rest of the installation.
4.Select the CIP Client Plugin you want to install. You may install both if you use both OrCAD Capture and System Capture.

5.If OrCAD Capture Plugin is selected, select the location of your Cadence 23.1 installation to install the OrCAD Capture Plugin.

CIP Client Install Location
6.If System Capture Plugin is selected, select the location of your "HOME" environment variable to install the System Capture Plugin.
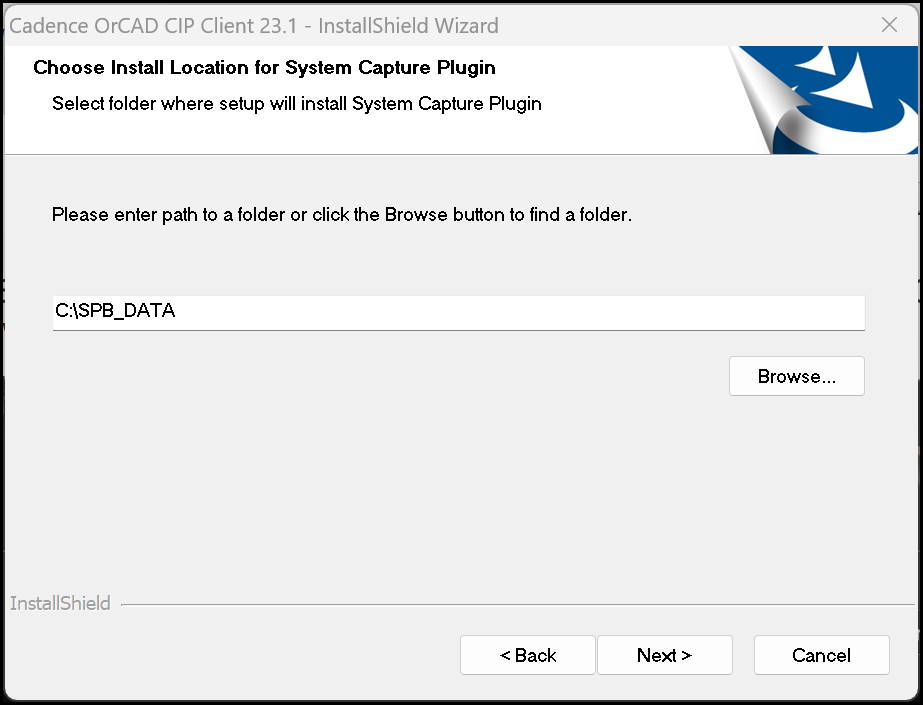
Note: The folder in which OrCAD Capture and System Capture loads TCL files are different. If an issue occurs or you do not see the CIP menu item in either OrCAD or System Capture, review the Troubleshooting Installation section for possible causes and solutions.
7.Click Next to continue to set up your company CIP web address. Enter the web address of your company's CIP server into the text input field.

Configure CIP URL with Installer
Note: If the URL of your company's CIP server is unavailable at the time of install, you can leave the input field blank and configure the CIP URL after installation is complete.
8.Click to place a check mark in the check box, Open CIP when Capture opens, if you want CIP to automatically start when you open Capture.
9.Click Next to continue.
At the Library Builder Executable Path screen, add the path to your Library Builder executable. If you don't have Library Builder installed, skip this step. If you install Library Builder after this installation, you can add the Library Builder executable location at that point.

Set up Library Builder Executable Path with Installer
10.Click Next to continue.
If the OrCAD Capture Plugin is selected, an ODBC setup dialog appears. The ODBC Data Source screen sets up your data source for the CIP database. If you already have the CIP-E_CIS_DB data source set up, leave the input field blank. If this is your first time connecting your Capture CIS to CIP, enter the SQL Server Name into the input field. If the SQL Server Name is either unavailable or you need to change this later, see the section regarding manual set up of client ODBC data source to change or set this up.

ODBC Data Source Setup with Installer
11.Click Next to continue.
If the System Capture Plugin is selected, a CDS_SITE setup dialog appears. Enter the location of your CDS_SITE. If you already have this environment variable defined, it will show your current setting. If you don't have it defined, this will be added for you. The section Manual Setup or Edit to CDS_SITE Environment Variable provides instructions on how to add or change this variable manually when needed.
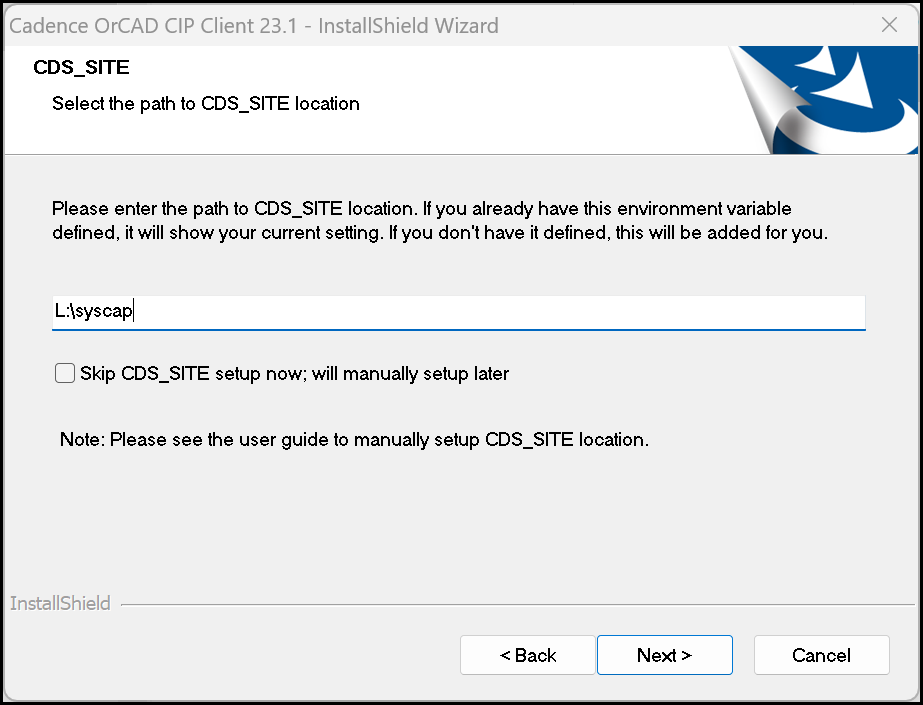
12.Click Next and then click Install to finish the installation.
You can validate the creation of the ODBC data source by following the instructions for manual setup of Client ODBC Data Source.