The instructions that follow guide you through the creation of the Client ODBC data source. These instructions can also validate the data source as well.
If users are unable to complete this procedure, verify the user has local administrative permissions on the client machine.
To open the ODBC Data Source Administrator
1.Select the menu items, Start > Control Panel > Administrative Tools > Data Source (ODBC).
Note: Use the 64 bit ODBC data source.
2.If not configured with the CIP Client installer, click on the System DSN tab.
3.Click Add.
4.Select SQL Server and click Finish, as shown in the following figure.
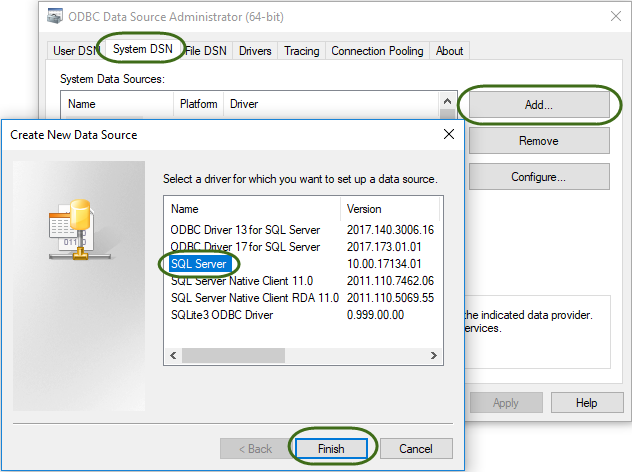
Creating an ODBC Data Source
5.If you already have CIP-E_CIS_DB created, select CIP-E_CIS_DB and then click the Configure... button.
6.Follow the rest of the instructions in this section to verify that the ODBC data source is correct.
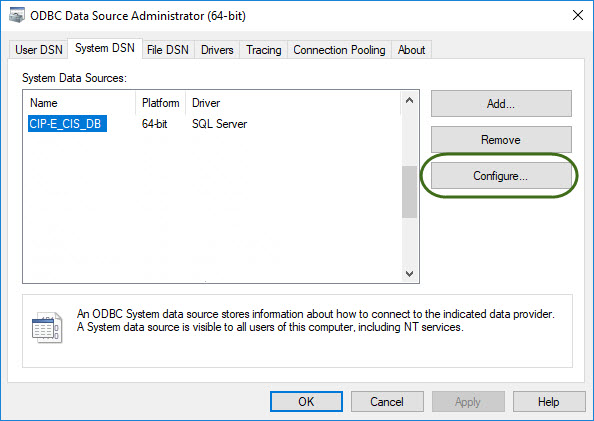
Configure ODBC Data Source
7.Enter the following information:
Data Source Name: CIP-E_CIS_DB
Note: All CIS Users must use the same data source name.
•Description (Optional)
•The name of the SQL Server hosting the CIP-E SQL Database.
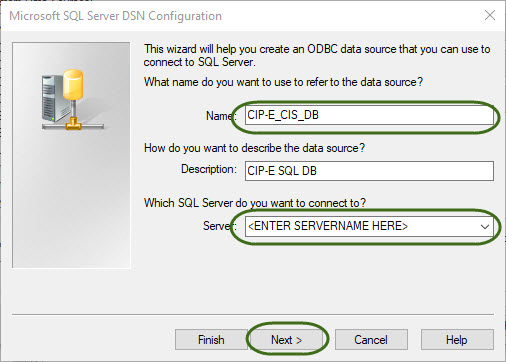
ODBC Name and SQL Server Database Selection
8.Click Next to continue.
You will next need to authenticate to the CIP-E SQL database.
9.Select With SQL Server Authentication… and enter the username and password shown below. This username and password will be needed to access the CIP_E database from CIS.
If the password has been changed after installation, you will need to obtain the new password your database administrator. The password that comes pre-installed with the software is as follows:
Username: CIP_E_CIS_User
Password: Test1234
Note: The CIP_E_CIS_User account does not have full access to the CIP_E database. Access to the SQL server and any database is normally controlled by a company’s IT or DBA. Users needing to import data should contact the IT or DBA for access.
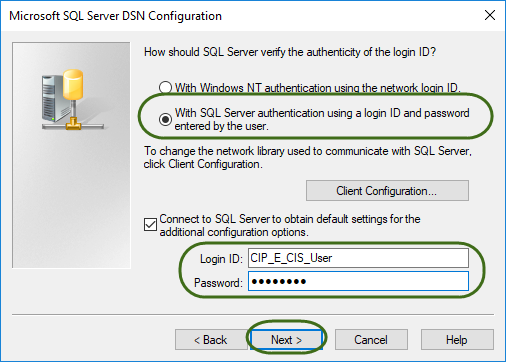
Set Authentication Mode, Login and Password
10.Click Next and ensure that the default database is CIP_E.
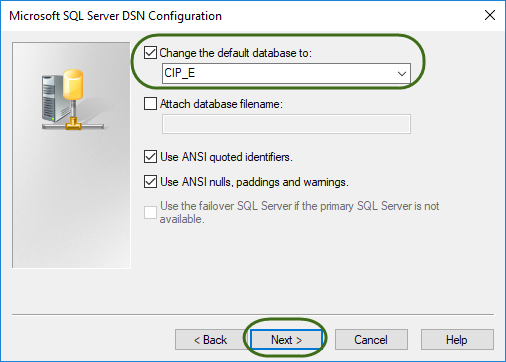
Set Default Database
11.Click Next, then click Finish. Click OK.
You will now see your new connection in the System DSN tab. Click OK to close the ODBC Data Source Administrator.