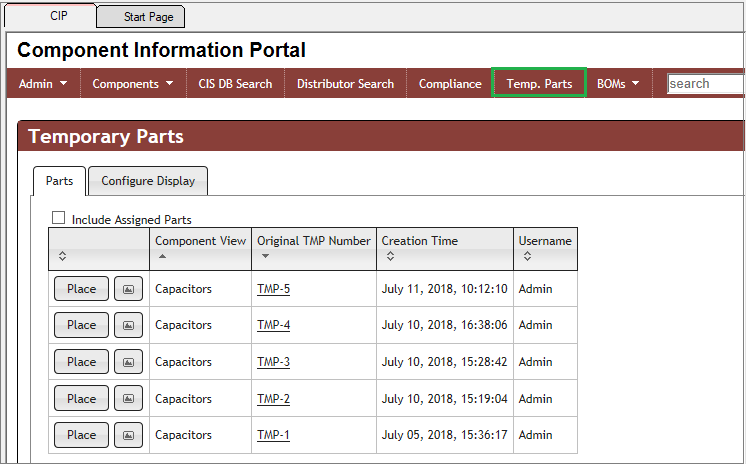
The Temp. Parts page helps you manage temporary parts (TMP-XX parts). Select the Temp. Parts menu to open all the temporary parts created and not processed yet. Users can optionally display processed Temp Parts as well. (Refer to Including Assigned Parts).
Creating and Viewing Temp Parts
Temp Parts can be created using several methods.
•Using the Distributor Search feature as described in the previous section.
•Using the New > Add as TMP feature to create a new Temp Part.
•Using the Copy > Copy as TMP feature to create a new Temp Part from an existing Formal or Temp Part.
•Deriving a database part in Capture CIS, from the Schematic Design or CIS Explorer window. Refer to the OrCAD Capture CIS User Guide for additional information.
Regardless of the creation method used, the Temp Part created is automatically assigned the next available temporary part number (in the form of TMP-XX). This number will be reflected on the Temp. Parts list. Additionally, CIS users are able to view and place the Temp Parts on their schematic designs. Once they are converted to formal parts, CIS users can update their schematics using the Part Manager.
Note: Preview and place buttons are not available in Temp Parts page when CIP is opened in System Capture.
Temp. Parts List
CIP allows users to display additional parametric fields in the Temp. Parts list. Display fields are stored on a per-user basis, since different users may wish to see different fields in their Temp. Part list.
To customize the user display of parametric fields in the Temp. Part list
1.Open the Temp. Parts > Configure Display tab.
2.Click a parametric field(s) listed in the left column to add it to the display fields on the right. Fields listed in the right column will be included in the Temp. Parts View.
3.Click the Trash button to the right of a fields in the right column to remove it from the list of included display fields.
4.Re-order fields, if desired, by clicking and dragging any item up or down the list.
5.Click Save and the Temp. Parts list updates the field list and associated data.

Temp. Parts - Configure Display - Add PCB Footprint, Schematic Part, Value, and Tolerance

Temp Parts List – Additional Fields
Assigning a Temp Part to an Existing Part
If a Temp Part was generated in error and you find that a it is a duplicate of an existing part, the Temp Part can be assigned to the existing part by selecting the part to be assigned and clicking on the Assign to Part button. The Temp Part information will be removed and only the existing part information will be retained.

Assign Temp. Part to an Existing Part
Changing a Temp Part to a Formal Part
For Temp Parts that are valid and should be added to the database formally, the Temp Part number will need to be changed. Changing a Temp Part number to a formal part number can be done by selecting the Edit button ![]() inside the Part Information page. Part updates are reflected in both CIP and CIS, as they share a common parts database.
inside the Part Information page. Part updates are reflected in both CIP and CIS, as they share a common parts database.

Edit Temp Part
Manually input the desired PART_NUMBER or click the auto-generate button ![]() to pull the next available number for the current part's View (Inductors in this case). Update any additional fields, if desired. Click the Save button
to pull the next available number for the current part's View (Inductors in this case). Update any additional fields, if desired. Click the Save button ![]() to save the change(s). The TMP-XX part is now a formal part.
to save the change(s). The TMP-XX part is now a formal part.

Manually Input or Auto-Generate Formal PN, then Save

Formal Part Number
Converted Temp Parts may not be shown in the Temp Parts list if you aren't displaying Assigned Parts. To view Assigned Parts, click the Include Assigned Parts checkbox. This option allows users to view converted Temp Parts that are now Formal Parts. When a Part Number is assigned to a TMP part, a change to the Part Number of the Original TMP Number is also updated.
*Note: This setting is stored on a per-user basis.
 Not Shown")
Unchecked Include Assigned Parts - IND-00000001 (Formerly TMP-32) Not Shown
 Shown")
Checked Include Assigned Parts - IND-00000001 (Formerly TMP-32) Shown