User controls within the Search tab, enable you to:
1.Search for parts by Keyword, or Manufacturer Part Number.
2.Examine part details.
3.Save the Manufacturer PN with Silicon Expert Compliance Info to a New TMP Part or Add to Existing Part.
Search
To initiate a search, click the Search Type drop-list and select an option. Enter a search term in the Search Text field and click the Search button.

Silicon Expert Search Type Drop Menu
The number of parts for which you can retrieve compliance information is determined by the terms of your Compliance Module or Silicon Expert API subscription. To determine how many parts you have remaining, refer to the account information section in the upper right corner of the Silicon Expert window. The number of "Parts Used" identifies the number of parts for which you have viewed part detail information. The parts listed in the Search Results tab (shown below) do not affect the number of parts used. Each time you select a new part to view, that view is added to the number of parts used. The screen image below highlights this tally in the upper-right corner of the screen.
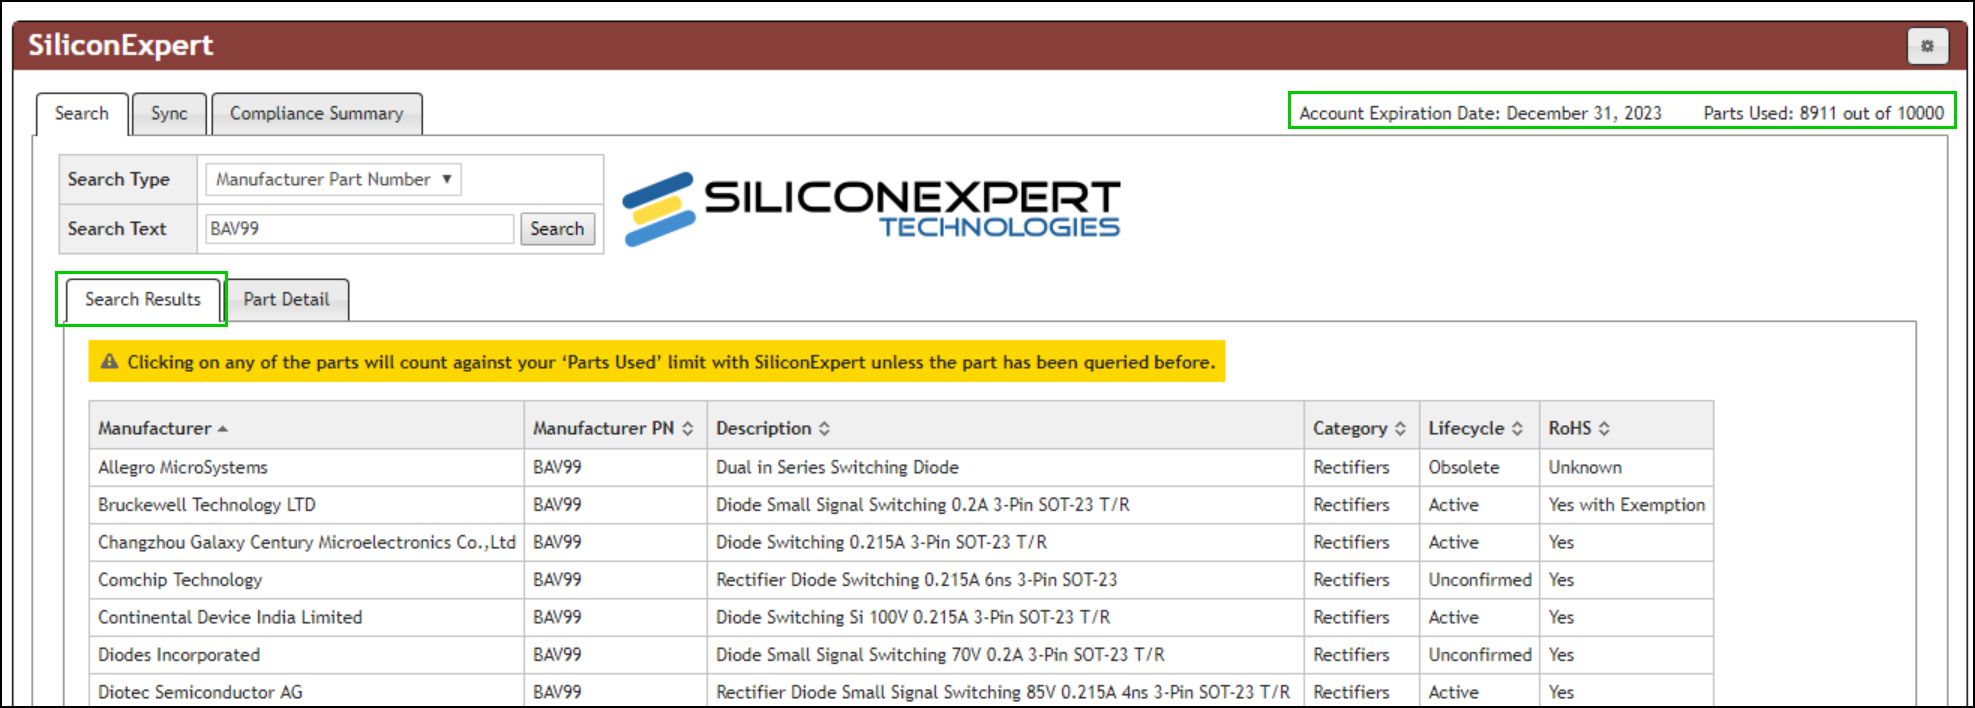
Silicon Expert Parts Used Count
Examine Part Detail
Once you find a part you want to view, you may click it to display the Part Detail.
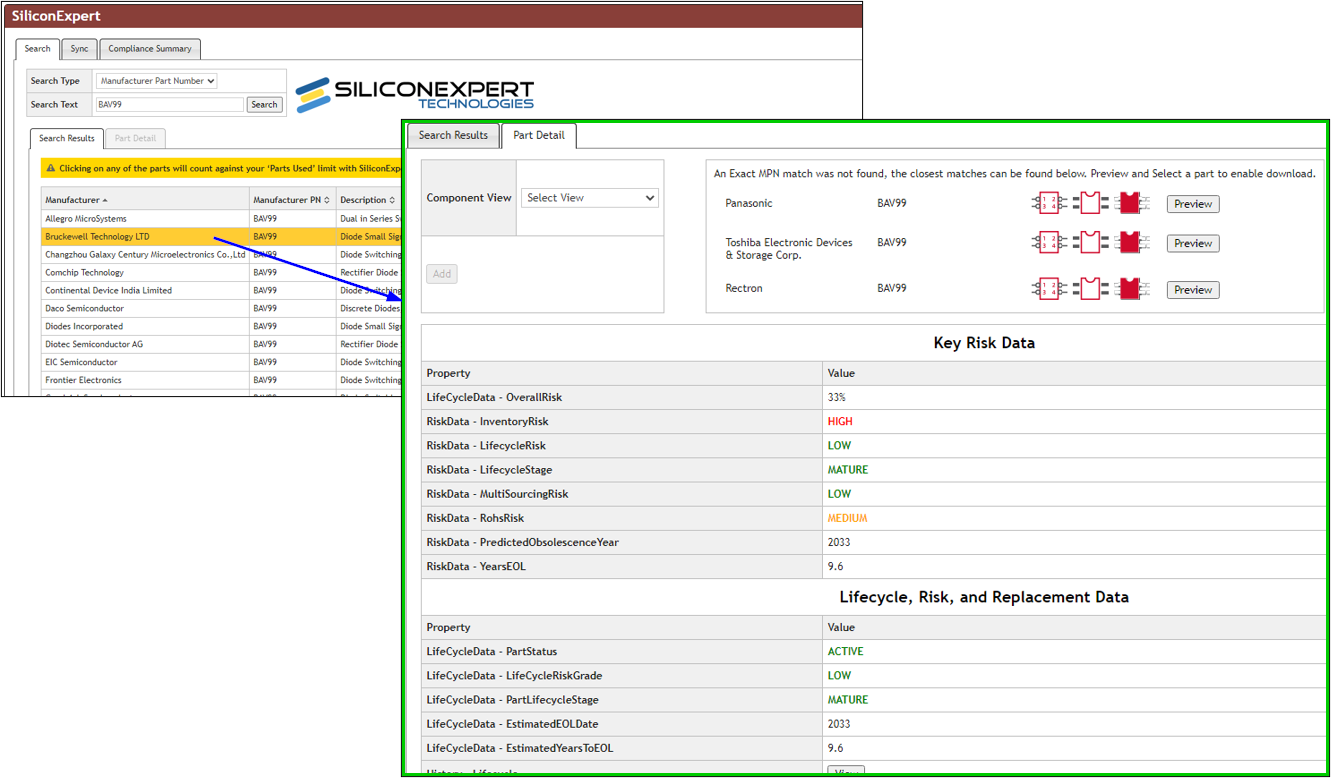
Highlight part and click to open Part Details
The field data in the Silicon Expert Part Detail tab is presented in the sections below. The exact Properties/Fields will vary per specific Manufacturer PN and your company's CIP Compliance Module or Silicon Expert API subscription.
▪Key Risk Data - This section includes a part's key risk data to help quickly decide if you want to add a part to CIP.
▪Lifecycle, Risk, and Replacement Data - This section includes a part's lifecycle (status, grade, EOL info, etc.), risk, replacement (sources, reason, grade, etc.), counterfeit, and PCN (date, type, source, EOL info, etc.) data.
▪Summary and Manufacturing Data - This section includes a part's summary (AEC/automotive, military spec, datasheet, taxonomy, etc.), product image, and manufacturing (MSL, finish/plating, reflow, etc.) data.
▪Compliance, Environmental, and Regulatory Data - This section includes a part's compliance/environmental (Reach, China RoHS, RoHS, WEEE, chemicals, conflict minerals, etc.) and qualification (agency, CECC, energy, ESD, ESCC, reliability, etc.) data.
▪Package Data - This section includes a part's packaging (body/case, dimensions, description, pin count, etc.) data.
▪Attributes - This section contains all part fields that are not included in one of the field groups above.
The following Silicon Expert fields will have colored text based on their specific values as shown below. Field values not matching those below will be shown in black, which is the default. These text colors will appear when viewing the Part Detail page of the Silicon Expert search, as well as when viewing the Manufacturer PN in CIP.

Silicon Expert Field Colors
Below is an example from a CIP Manufacturer PN containing some of the values that use colored text. In this example, the Manufacturer PN fields have also been configured into groups and reordered using Reorder View Fields.

CIP Manufacturer PN with Silicon Expert Field Value Colors
When Ultra Librarian download is enabled, you will need to log in before you can preview or download ECAD models. If you don't have an account, you can register by selecting the Click here link. The Ultra Librarian information is not shown when CIP is open from a standard browser. Ultra Librarian models may be downloaded along with the creation of a TMP part the same way as creating a New TMP Part from Distributor Search.
Compliance information may be transferred to the CIP database by adding the information to New TMP Part or Existing TMP or Formal Part. To add compliance data, first select a Component View.
Select a Component View
Create TMP Part
Options available when adding a Temp Part from the Compliance page are similar to those presented when creating a new TMP Part from Distributor Search. To add compliance information to a New Temp Part, use the Action Create TMP Part. Then click the Add button. All Silicon Expert properties mapped to CIP fields are transferred to the configured CIP part.
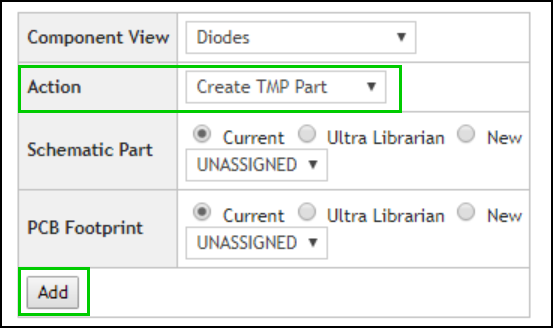
Action: Create TMP Part
When you select a Component View for your new TMP part, a Mapping column appears between the Silicon Expert Property and Value columns of each field group/section. The Mapping column is shown in the image below. After you review the SE properties associated with your new TMP part, you may select a CIP field to map to a given SE Property to transfer its Value during TMP part creation. Each time you select a new CIP field to be mapped, you must click the Add button ![]() to apply the mapping. You can delete a property mapping by clicking the Delete button
to apply the mapping. You can delete a property mapping by clicking the Delete button ![]() located to the right of the CIP field name in the Mapping column.
located to the right of the CIP field name in the Mapping column.
Note: After a CIP field is mapped to an SE Property, it is removed from the drop-down list shown in the Mapping column. Each property has its own drop-down list that lists all CIP fields that are available to be mapped. A CIP field can only be mapped to one SE Property, but you may map the same SE Property to multiple CIP fields.
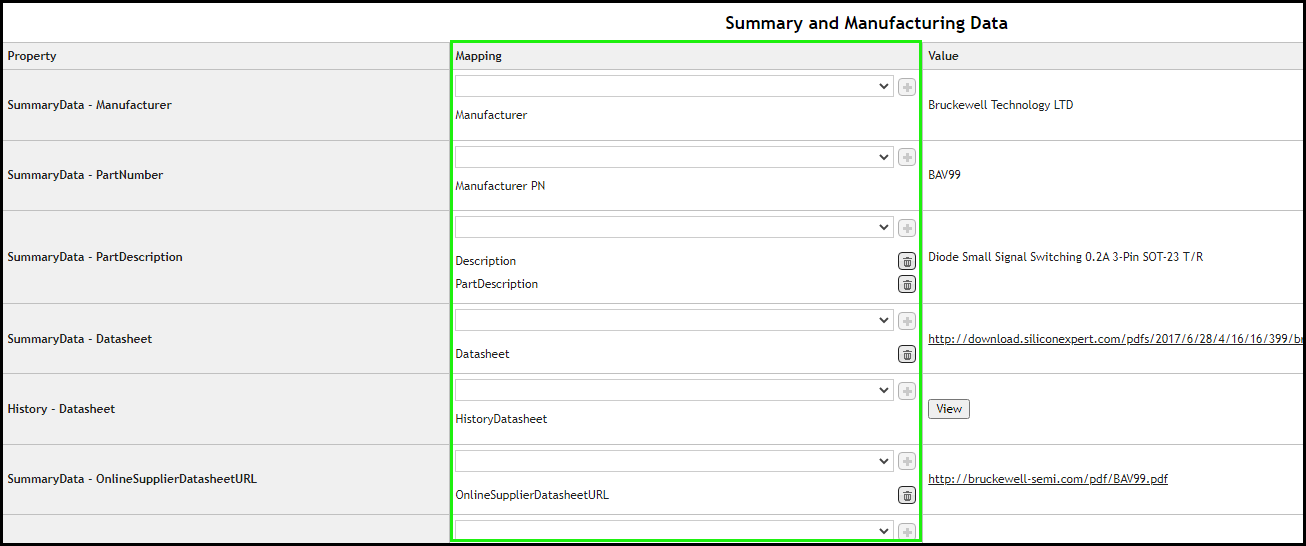
Mapping Column Becomes Visible After the Component View is Selected
Note: You are only able to map CIP fields that your CIP Admin has granted you permission to edit. For example, if your Admin has not granted you permission to edit the Description field, you will not be able to map it to an SE Field..
Add to Existing Part
Options available when adding to an Existing Part (Formal or TMP) from the Compliance page are similar to those presented when Adding a Distributor Part to an Existing TMP or Formal Part. To add compliance information to an Existing TMP or Formal Part, select the Action Add to Existing Part. You have the option to overwrite existing component data. If you want to overwrite component data, you may update the distributor property mapping before adding your changes. To update existing component data, place a check in the checkbox for Overwrite Component Data. If you do not want to change the component data, leave the checkbox blank. Click the Add button to transfer the compliance information to the existing part.
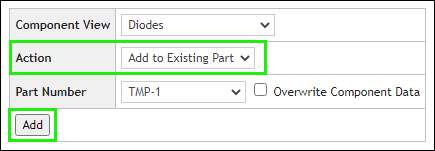
Action: Add to Existing Part