Each field of a component view may be changed individually or across all views that share the same Field ID. To customize a field, select the Edit button ![]() and modify the desired fields. After making updates, click the Save button
and modify the desired fields. After making updates, click the Save button ![]() to save your changes or the Cancel button
to save your changes or the Cancel button ![]() to discard them. To save the field across all part views, click the Save All button
to discard them. To save the field across all part views, click the Save All button ![]() . When using the save all option, a pop-up window will appear to confirm the change.
. When using the save all option, a pop-up window will appear to confirm the change.
The following figure is a sample view named Capacitors, derived from the CIP_Capacitors table, that shows fields that can be modified.
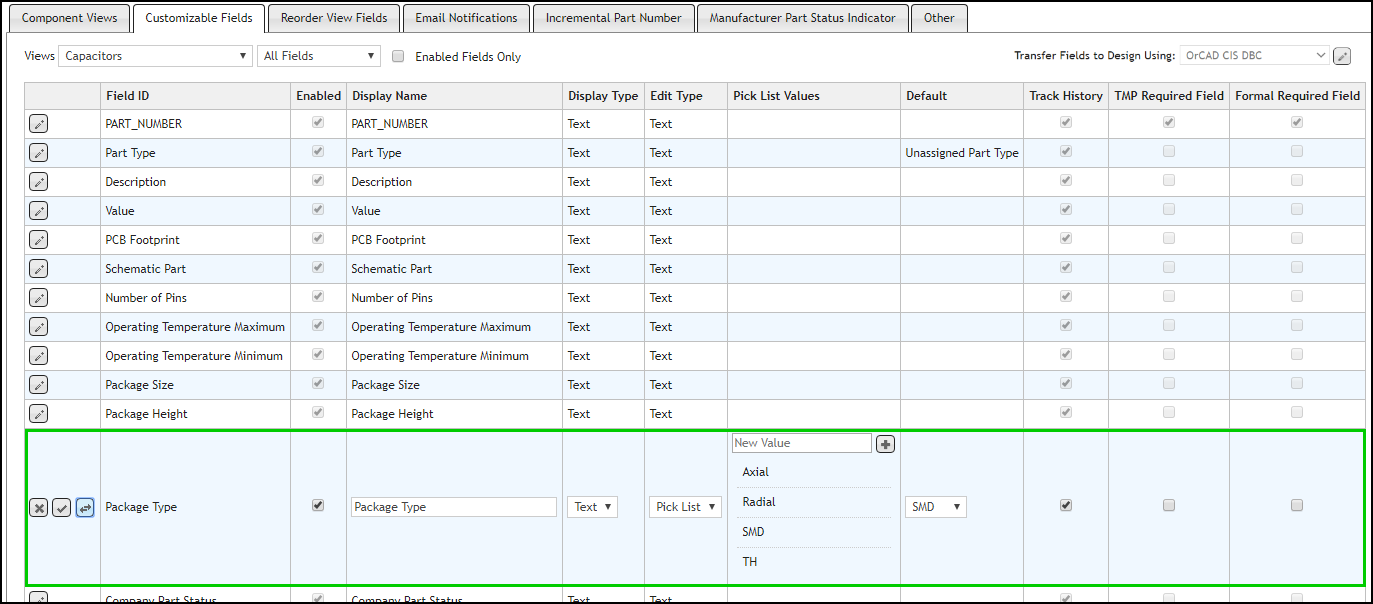
Sample Capacitors Customizable Field Options
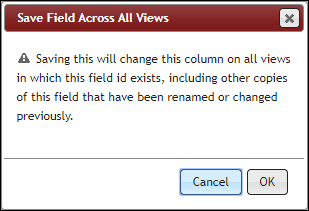
Save Field Across All Component/Part Views
Select or deselect the Enabled checkbox to add or remove a field from a view. You may alter the Display Name column to change the way the field name appears in CIP. After choosing the Display Name, select the Display Type, which can be Text (standard) or Link (recognized as active hyperlinks). You may define a field's Edit Type as user editable Text or Pick List. If you select Pick List, you need to enter the Pick List values. To add values to your pick list, type in the text box, then hit Enter key or click the Add button ![]() . Click and drag a pick list value to change the sequence of the pick list. To remove a value from the list, hover over the item on the list and click the Remove button,
. Click and drag a pick list value to change the sequence of the pick list. To remove a value from the list, hover over the item on the list and click the Remove button, ![]() . If you want the pick list to have an initial default value when new parts are created, you can select from the list after you have added all your pick list values.
. If you want the pick list to have an initial default value when new parts are created, you can select from the list after you have added all your pick list values.
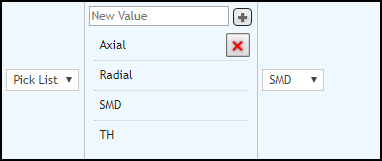
Sample Pick List Configuration
If you want to exclude field modifications from the Part History, you can disable Track History by de-selecting the check mark. This removes the field from the Part History. Repeat this process for each field you want to customize. Fields that change frequently should has history tracking disabled to keep history to a manageable size.
If you want to make a field mandatory when a TMP part is created or modified, you can enable the TMP Required Field by selecting the checkbox. Users will not be able to create or change a TMP part without populating the field.
If you want to make a field mandatory when a formal part is created, modified or converted from a TMP part, you can enable the Formal Required Field by selecting the checkbox. Users will not be able to create or change a formal part without populating the field.
Note: TMP and Formal required fields are only enforced using the new, edit, and copy part forms. They are not enforced when using Compliance Search, Distributor Search, Import, or external integrations.
The following figure shows a sample configuration for the Capacitors view. UserField01 and UserField02 are highlighted in green to provide an example of user-defined fields.

Capacitors View Customization Sample
After you configure the Customizable Fields, navigate to the appropriate Component View. From there, you may View or Edit any field included in that View. The custom fields will also appear in the CIS DB Search, under the Parametric Field drop-down list.
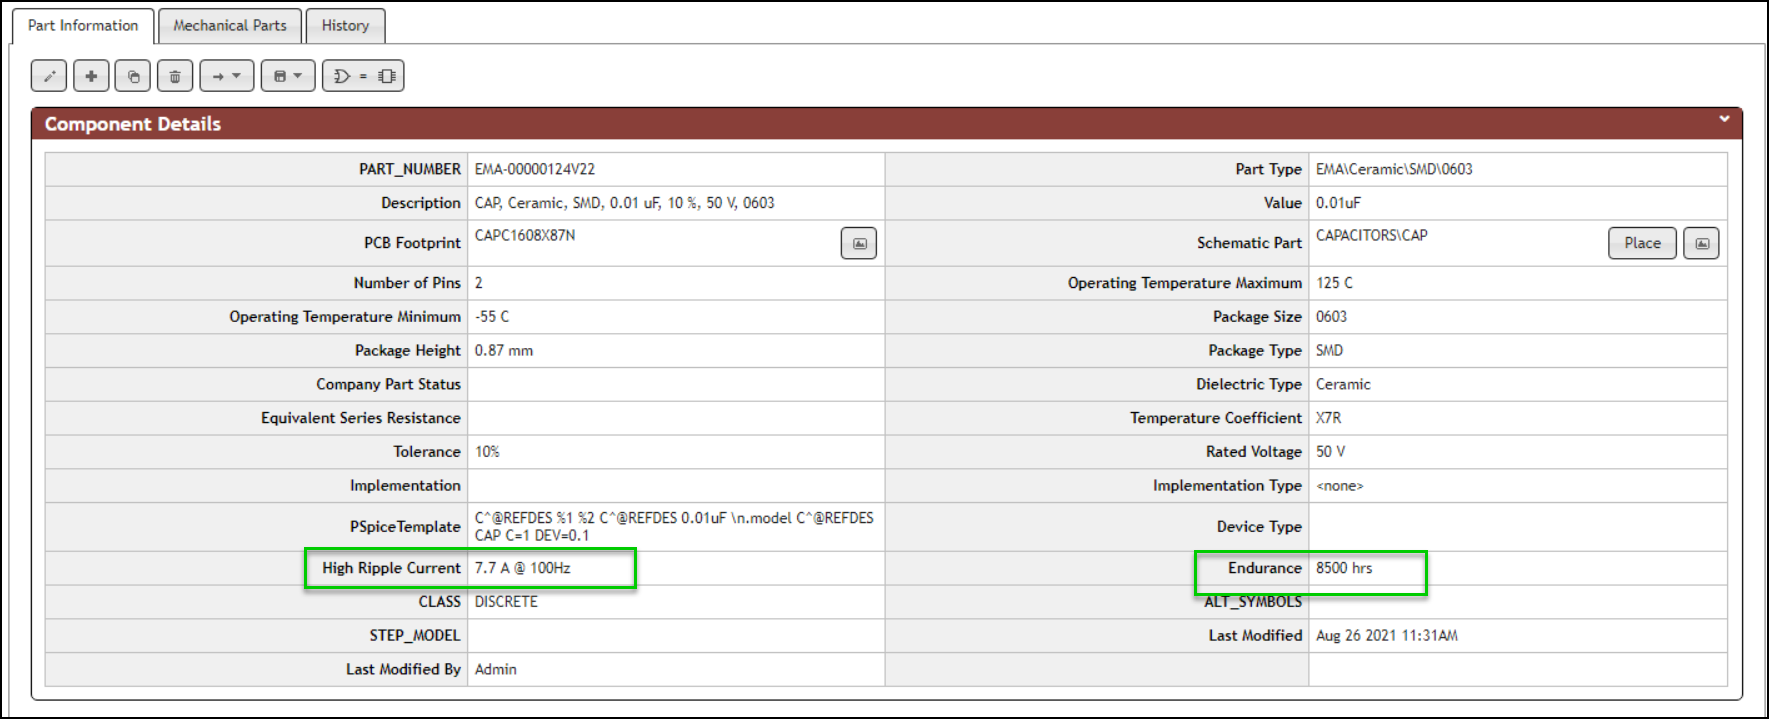
Custom Fields Shown in a Capacitor Part Data
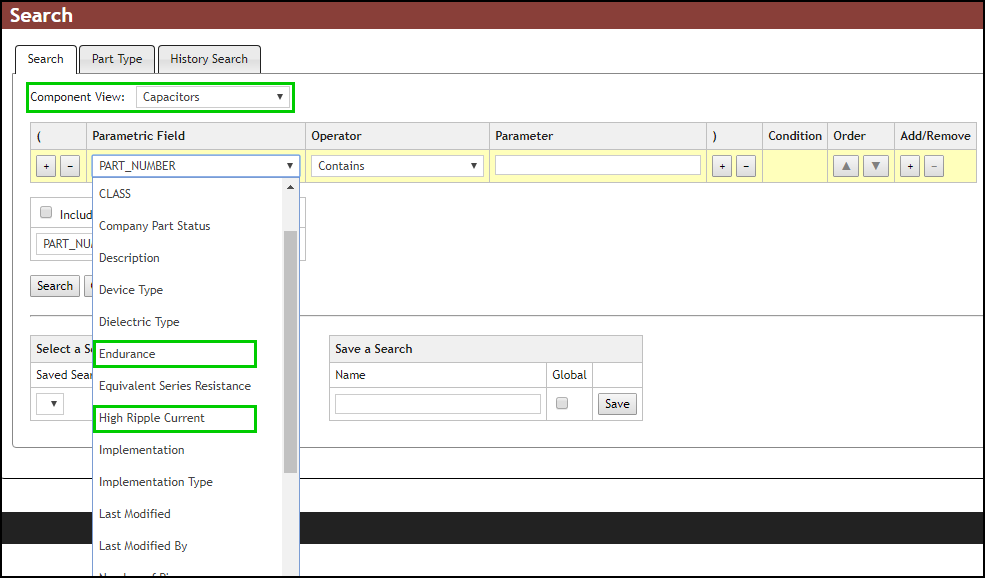
Custom Fields In CIS DB Search
Note: When you modify or enable the display name of a field and update the field in the Component View, CIS users who use CIS Explorer or Part Manager are affected. The CIS .DBC file will also need to be updated as explained in the Appendix.