When you want to move a single part from one component view to different view, you can open the part page in CIP, click the Move ![]() button and select the Component View from the drop-down menu. If you use the Move button to move a part to another component view that is to the same table, the part history remains intact. However, if you use the Move button to move a single part to the component view of a different table, the part history will be lost.
button and select the Component View from the drop-down menu. If you use the Move button to move a part to another component view that is to the same table, the part history remains intact. However, if you use the Move button to move a single part to the component view of a different table, the part history will be lost.
You can easily move a group of parts from one view to another by using the Component View Mover tool. However, the originating and target views must be within the same table. The Move button is only visible when you are granted permission to delete and create parts.
Note: Fields can only be transferred to a new view when the field names of the two views match. The values of fields that have a different field name are lost in the new view.
To move a part to an alternate view
1.Open the part. The name of the view associated to the part displays in the part header.
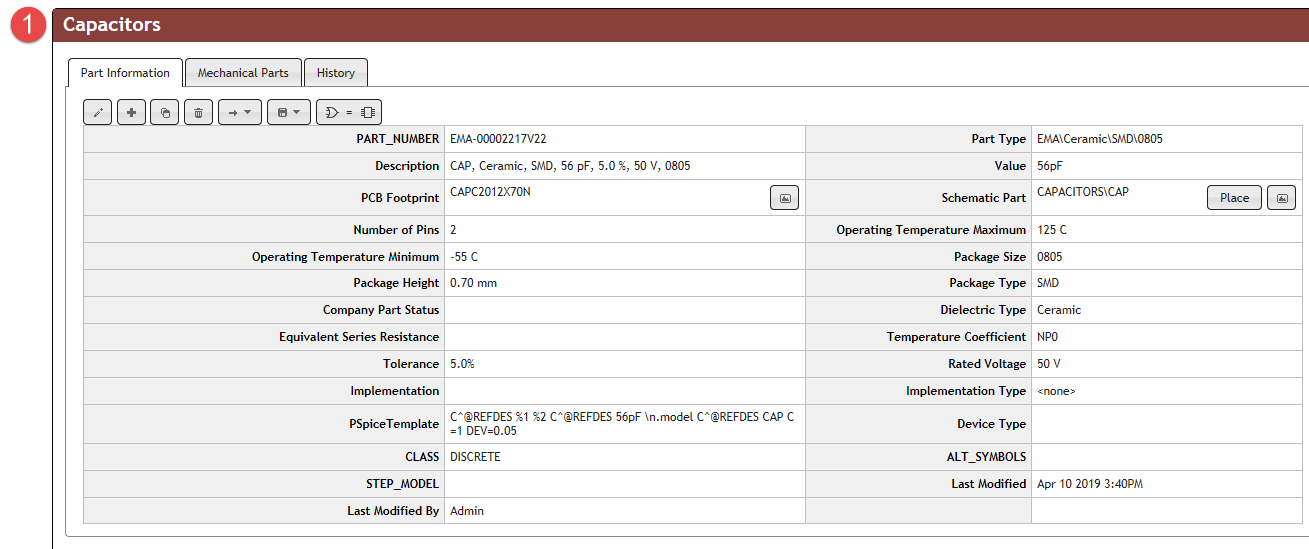
The example below shows PART_NUMBER 00002217V22 in the Capacitors view.
2.Click the Move button.
3.Select the alternate name of the view you want to associate to the part from the drop-list menu.
The example that follows shows the selection of the Ceramic view, which is a user-defined view as setup in the Admin > Configuration > Component Views page.

Note: When moving parts to a view that is associated to a different table, history records of all prior changes will be lost. This information is also stated in the warning for this case.
4.Verify the view header to confirm the view you selected is associated to the part.

Part view displays in header