The bulk delete process begins with the selection of the Admin > Bulk Operations > Bulk Delete menu. Each time you select the menu, you are required to verify part configuration before you can simulate and delete parts. This gives you the opportunity to review and update part mappings when fields have changed.
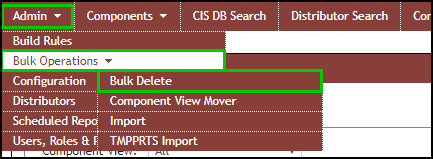
Admin > Bulk Operations > Bulk Delete
A warning shows immediately, informing you that deletion is permanent and advising you to back up your database before proceeding.

Bulk Delete Warning Message
To configure part data from CSV to CIP
1.Select the Admin > Bulk Operations > Bulk Delete menu.
2.Click the Configuration button.
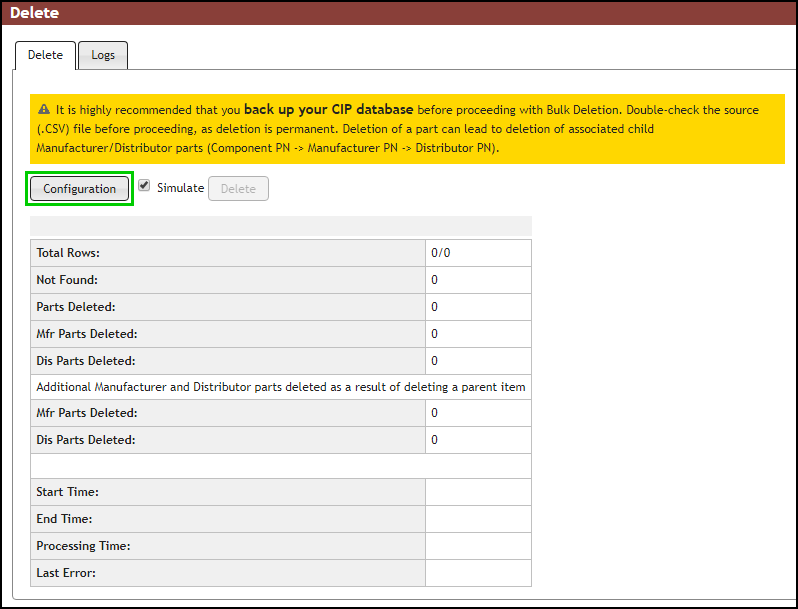
Configuration Button Opens CSV File Window
If for some reason the bulk delete was interrupted by unforeseen activity (e.g. database restart) or the deletion stalls at the same state, the Configuration button will be disabled and will be enabled after 30 minutes.
3.Click the Choose File or Browse button (depending on your browser) to select the .CSV file you want to upload.
Note: The CSV file must be a valid CSV file without duplicate column headers. Extra columns of data without headings are considered duplicate headings.
4.Verify that the delimiter selected by default matches the delimiter of your file. Enter another delimiter if needed.
5.Click the Upload button. If successful, the Key Field Configuration screen will appear when the upload process is complete.
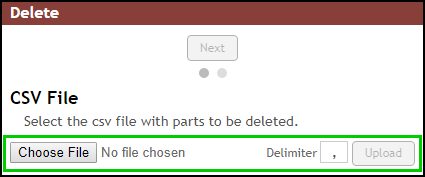
Choose File, Delimiter, and Upload
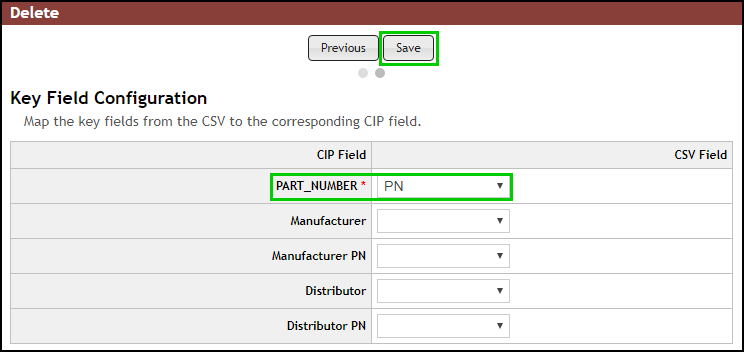
6.The Key Field Configuration screen shows the CIP fields and the .CSV fields of your uploaded file side-by-side to help you map the key fields. Select desired Import Fields from your uploaded .CSV file to map them to the CIP fields.
•PART_NUMBER – This is the company part number (component PN) field. This field is a required field that must be mapped.
•Manufacturer/Manufacturer PN – These fields identify the manufacturer name and manufacture part number, only required when you want to delete specific Manufacturer/Manufacturer PN associations from a component PN. Once you specify Manufacturer, Manufacturer PN becomes required, and vice versa.
•Distributor/Distributor PN – These fields identify the distributor name and distributor part number, only required when you want to delete specific Distributor/Distributor PN associations from a specific Manufacturer/Manufacturer PN. Once you specify Distributor, Distributor PN becomes required, and vice versa. In addition, Manufacturer/Manufacturer PN becomes required.
7.Click the Save button to complete configuration and take you back to the Delete tab's summary screen. You are now ready to Delete Parts.
Delete the specified component PN and ALL associated child MFR/MFR PN and Dist/Dist PN pairs.
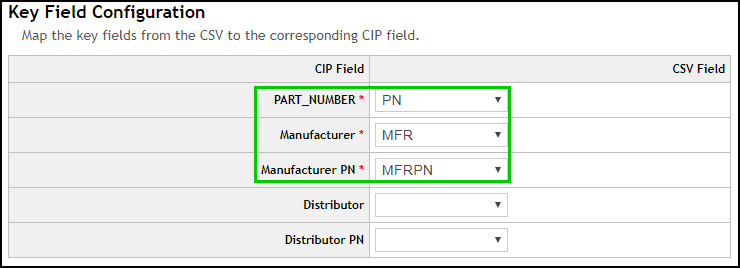
Delete only the specified MFR/MFR PN associations from the component PN, along with ALL MFR/MFR PN child Dist/Dist PN associations.
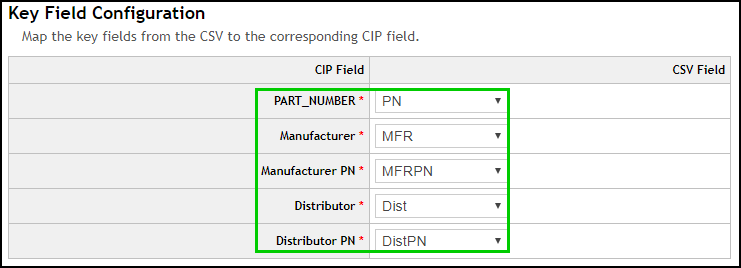
Delete only the specified Dist/Dist PN associations from the MFR/MFR PN.
Import File Format
Ensure your .CSV file satisfies the following formatting conventions:
•The import file must be in CSV format. Excel can be used to generate CSV files. After creating your file, you need to save the file as a .CSV file.
•The first line of the file must contain the field names for each column. If a title is in the first few lines of the file, you will need to remove those lines first. The field name for each column must be unique.
•There must be a column for the component PN (PART_NUMBER). Parts without a part number will not be deleted and will be considered Not Found. Manufacturer, Manufacturer PN, Distributor, and Distributor PN are optional columns, only required when you want to delete specific associations to a component PN.
•The CSV file must not have any duplicate column headers. This includes duplicate blank columns with blank headings.
•All rows within the CSV file should have the same number of columns.
•Characters in the CSV file must be UTF-8 encoded to avoiding encoding warnings.
Warning about using Excel
Older versions of Excel, when used to create or edit .CSV, have caused problems with creating files that are not well-formed. When this occurs, you will either need to manually fix the file or use a later version of Excel.