Uploading a parts list is a quick and simple process. To upload a parts list, you must first create a CIS BOM from Capture CIS (or other parts list) and save it as a (.CSV) file.
To upload a parts list
1.Open CIP and select the BOMs > Export menu.
2.Select the Upload BOM radio button if it is not already selected. Click the Browse button and navigate to the parts list. Select the file and click the Open button.

Browsing to a .CSV File
3.Notice the path and filename of the BOM you selected is now visible in the input field. Click the Upload button.

Uploading a (.CSV) Parts List
The part list opens.
4.Enter the row numbers for the first BOM child item (First Data Row) and Header Row as shown in the screen image below.
When the row numbers of the First Data Row and Header Row are entered, the header row becomes highlighted in a light shade of blue and the first row of data becomes highlighted in green (shown below).

Identify First Data Row and Header Row
5.Notice the blank fields above each column, (see screen image below). Click the drop arrow for the Part Number column and select PART_NUMBER from the list to map CIS and CIP parts. If your parts list contains a child BOM (or sub-assembly) you may also map the Revision and Variant columns to associate the child BOM.

Mapping the BOM PART_NUMBER Column
6.Continue with the export by adding additional fields you want to include with your export.
Adding Fields to a Parts List and Exporting
After you upload a parts list, you can add additional CIP database fields to the list before you complete the export by completing the steps that follow.
1.Verify the Header and Part Number fields are set up properly.
2.If desired, check the Include Component View checkbox to add the CIP view name to each part (e.g. Capacitors, Connectors, etc.).
Note: the view name is only available when the part in the list exists in CIP.
3.Check the Include Mechanical Part Data checkbox, if you want to include the quantity of mechanical parts used. Note: This option is only available for imported or uploaded BOMs.
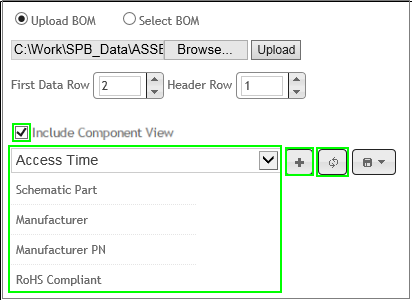
4.Select database fields from the drop-down list (highlighted in green box in the image below) to include additional fields for export.
Note: Items in the list of additional fields you can add are organized alphabetically by the groups Component/BOM, Component Manufacturer, Manufacturer, and Distributor.
5.After selecting a field, click the Add ![]() button. As each additional field is added it is included in the list that is located below the drop-down list. The image below, for example, lists the additional fields, Schematic Part, Manufacturer, Manufacturer PN, and RoHS Compliant.
button. As each additional field is added it is included in the list that is located below the drop-down list. The image below, for example, lists the additional fields, Schematic Part, Manufacturer, Manufacturer PN, and RoHS Compliant.

Add Part Table and Additional BOM Fields
6.Continue to add more fields as needed. When finished adding fields, click the Update ![]() button.
button.
The screen image below provides an example of the additional fields added: Schematic Part, Manufacturer, Manufacturer PN, and RoHS Compliant.

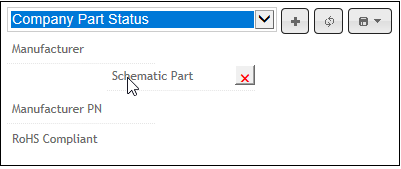
Select and Drag to Re-order Fields Added
7.To change the order of fields you are adding, select a field name and drag/drop it to a new position. To remove a field, hover over the field name and click the red X ![]() .
.
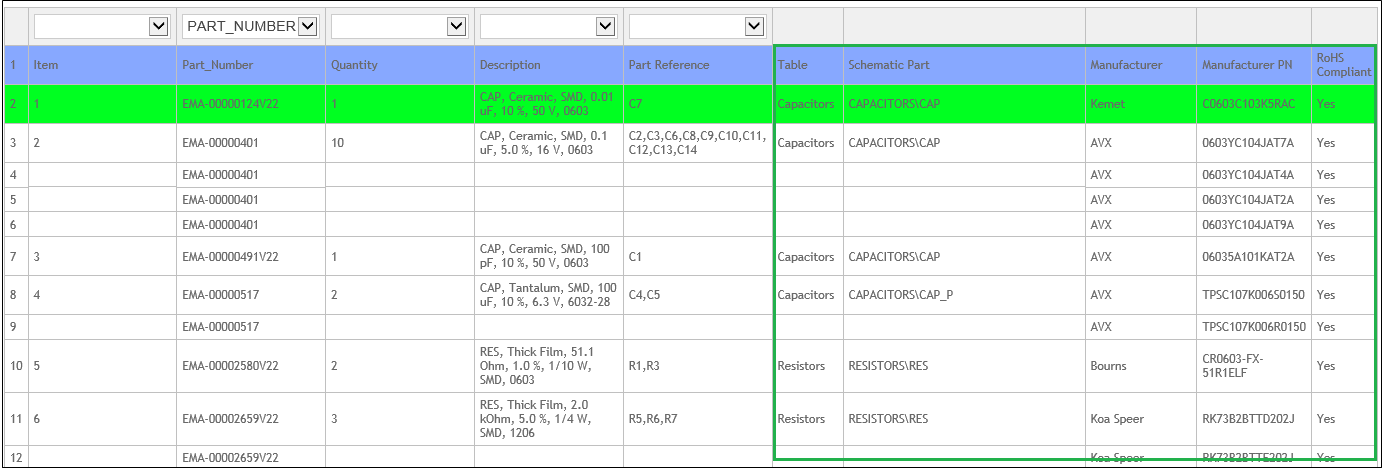
An example of an updated BOM is shown below. Notice how the green highlighted box outline shows the Table, Schematic Part, Manufacturer, Manufacturer PN and RoHS Compliant fields that are now visible in the parts list. This table also shows multiple Manufacturer PNs that are associated with single company part numbers.

Added Parametric Data Fields
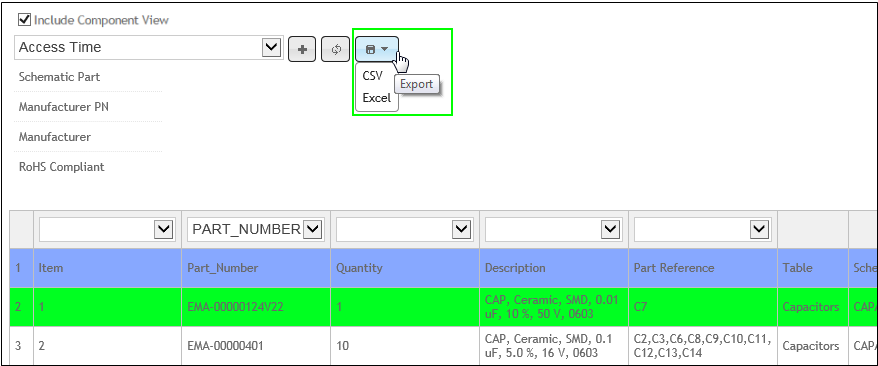
8.Once you have added the desired fields to the BOM, click the Export ![]() button and choose whether you want the file format to be Excel or CSV.
button and choose whether you want the file format to be Excel or CSV.
•If you choose the CSV format you are prompted to Save or Open the new (.CSV) file.
•If you choose Open, the file opens directly in your browser window.
•If you choose Save you are prompted to select a location to save the (.CSV) file.
Note: Export functionality is not available when using the System Capture plugin.

Export BOM as Excel or CSV File