The path of the technical datasheet links may be configured for access from the CIP web interface or Capture CIS Explorer. The datasheet paths in CIP will need to be updated according to the method configured by your IT administrator.
Your IT administrator may define datasheet paths using any of the following methods:
▪URL to datasheets (e.g. http://server/datasheetpath/datasheet.pdf) - Your IT administrator creates a virtual directory in IIS that is linked to your datasheet directory. If you choose to install the Starter Library, the virtual directory will link to the Starter Library datasheet directory on the web server. Your IT administrator needs to share this directory to allow users to add new datasheets. The virtual directory may be added as a path within CIP-E or as separate URL. Instructions that explain how to create a virtual directory are provided by Microsoft: https://docs.microsoft.com/en-us/dotnet/framework/wcf/samples/virtual-directory-setup-instructions.
▪UNC path to datasheets (e.g. \\server\datasheetdirectory\datasheet.pdf) - Datasheets can only be accessed by users using the CIS Explorer. Users opening CIP will need to copy and paste the path into the address bar of a File Manager window. This method may be slower the first time a datasheet is accessed.
▪Mapped drive to datasheets - Datasheets can only be accessed by users using the CIS Explorer. Users opening CIP will need to copy the path and paste it into a Windows file manager navigation address bar. If this configuration is set up, all users requiring access must have the same mapped drive letter.
Before updating the datasheet paths, determine which of the above options is configured. You need to update the Datasheet field to part datasheets whenever the location of the datasheets changes.
Updating the datasheet paths in CIP is a 3-step process:
1.Create a CSV export file that includes the CIP datasheet field.
2.Modify the datasheet field to the new datasheet path in the exported CSV file.
3.Import the modified CSV file to update CIP.
Step 1 - Create CSV export file
1.Open the CIS DB Search window and specify search options.
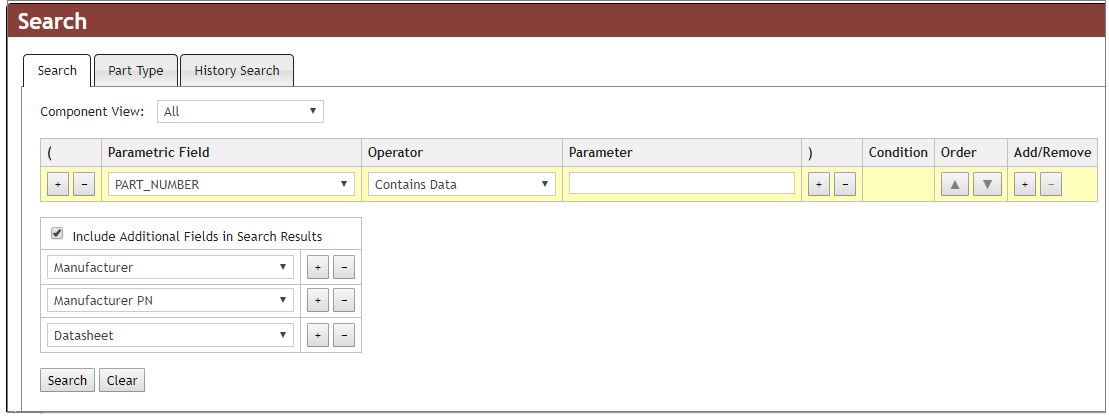
a)Select PART_NUMBER as the Parametric Field.
b)Select Contains Data as the Operator.
c)Check the Include Additional fields in Search Results check box and select Manufacturer, Manufacturer PN, and DataSheet.
d)Click Search.
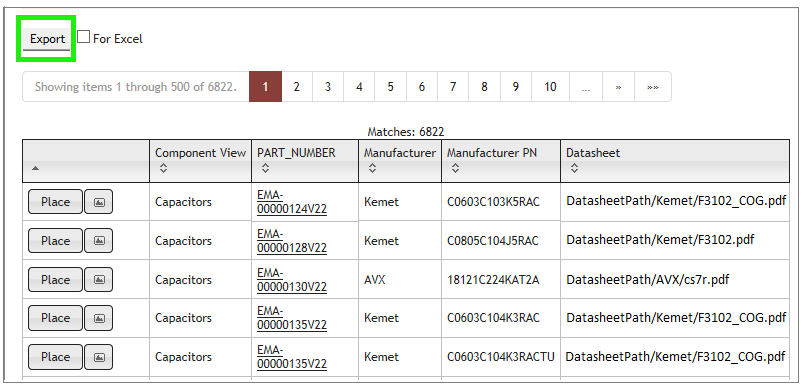
2.Click the Export button. (Do not check the For Excel checkbox).
Note: Export functionality is not available when using the System Capture plugin.
Step 2 - Modify the datasheet field
1.Open the exported file using Excel.
2.Conduct a search in Excel for the path you want to replace. The generic path to the Starter Library that needs to be replaced is "DatasheetPath/".
The next screen image that follows, for example, shows a search entry for DatasheetPath/.
3.Enter replacement text that matches the path your IT administrator configured, (URL, UNC, or network drive).
The example in the figure below shows replacement text for a URL.

Entry of Search and Replace Text
4.Click the Replace All button.
5.Save the .CSV file and close Excel.
6.Return to CIP.
Step 3 - Import the modified CSV file
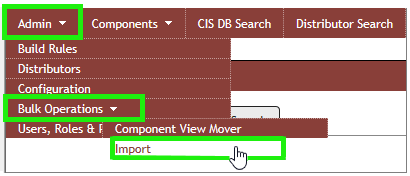
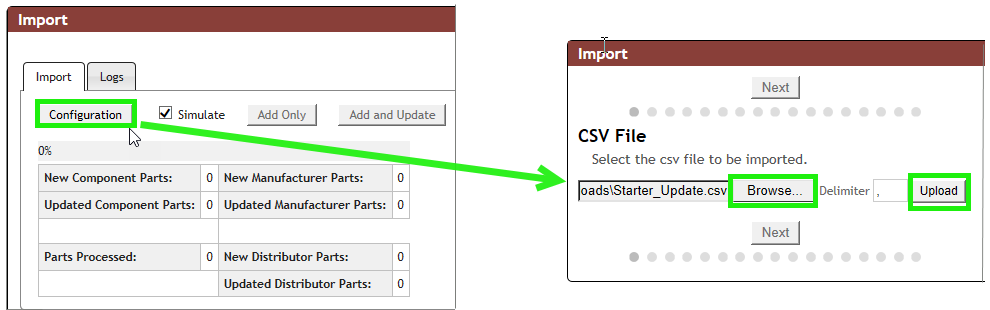
1. Select the Admin > Bulk Operations > Import menu to open the main Import window.
2. Click Configuration and browse to select the updated CSV file you saved in step 2. Then Upload the selected file.
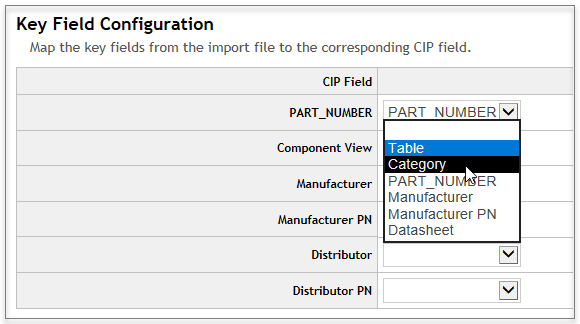
3. Map the Component View to Category. Page through the component configuration pages and save the configuration mappings.
4.From the Manufacturing Field Mappings page map the Datasheets field as shown in the screen capture below.
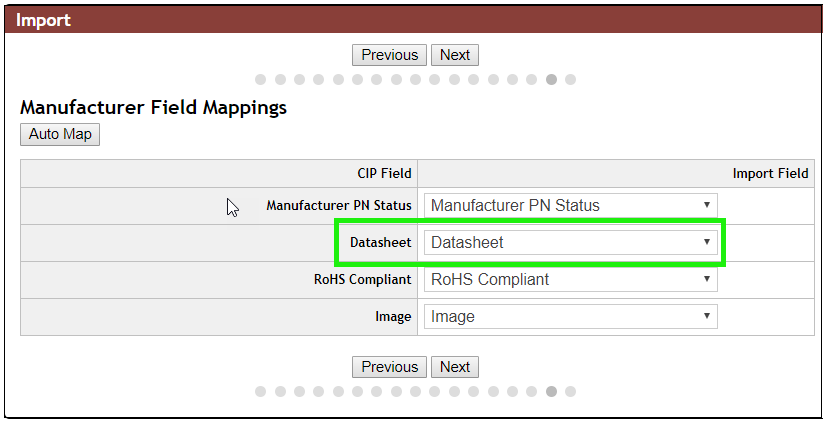
5. Save the configuration mappings.
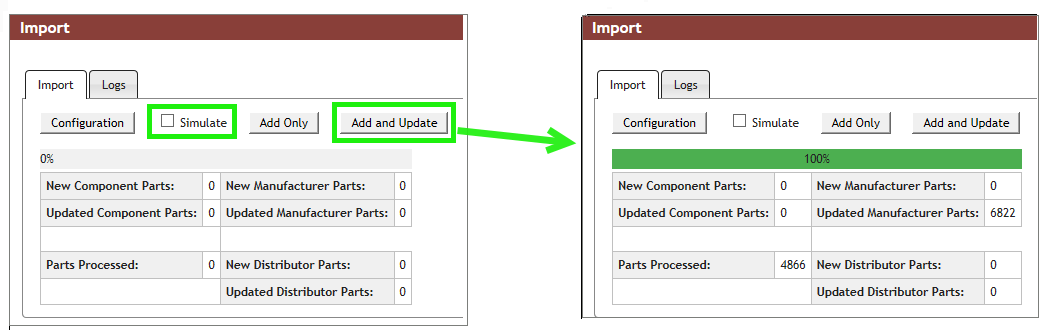
6.You may proceed by either simulating the import and review the log of potential changes first or making real changes to the database without simulate.
a.If you'd like to simulate the import before making any real changes to your CIP database, check the Simulate check box before clicking Add and Update.
b.To make real changes to your CIP database, deselect the Simulate check box and click Add and Update.
The green status bar informs you of the update progress which may take a few minutes.
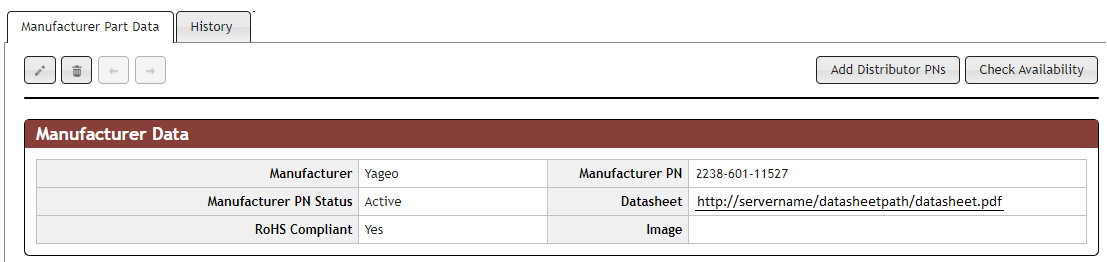
7.View the Manufacturer Data from the Part Details page of a component and confirm the path to the part datasheet successfully displays the part datasheet when selected.