Parts are imported into a BOM from the BOMs > View/Import > BOM Items section of the BOM Information page. You can import parts from either a .CSV formatted file using the Import Children button ![]() or import parts directly from an open Capture design using the
or import parts directly from an open Capture design using the ![]() button.
button.
Note: A BOM revision and variant must be created as described in the topic, Creating a New BOM before you begin the import process. The list of parts may be a Capture CIS BOM.
When importing from a CSV file, the parts list only imports part data into the open BOM revision/variant. Parts for each variant are imported separately. When you import parts from a design file, the core design and its variants are imported to the corresponding BOM revision and variant.
To import a BOM from a CSV file
1.Select BOMs > View/Import and select a BOM from the BOM PN drop list.
2.Click the Import Children ![]() button, located in the BOM Items section of your screen.
button, located in the BOM Items section of your screen.

Import Children Button
3.Click the Browse button. Navigate to the .CSV file that contains your part list. Select the .CSV file and click the Open > Upload buttons.
Note: The selected BOM must be formatted as a .CSV file. Additionally, all part numbers in the BOM must be in CIP prior to import.

Browse to Select .CSV File
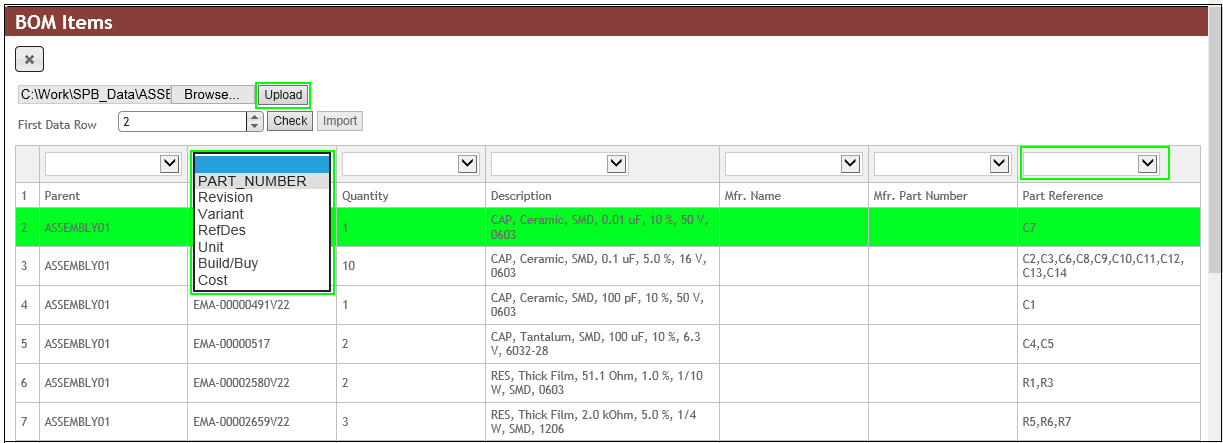
After the BOM uploads, a list of parts included in your BOM displays in the BOM Items area. Notice the blank fields that display above each column header.
4.Click the drop arrow for the Part_Number (PART_NUMBER) and Reference designator (RefDes) columns and map the BOM fields to your CIP database. If the BOM part list you are importing contains a child BOM (or sub-assembly), you also need to map the Revision and Variant columns. Map any other column fields you want to import.

Map Part Table Columns and Select First Row of Data Part Table
5.Select the first row of the data table and click the Check button to validate table rows/columns are mapped correctly. This validation check ensures part numbers in the BOM list are also in CIP.

Check BOM Part Mapping
Note: You are unable to import a BOM that has a part that is not already in CIP. Be sure to remove DoNotStuff (qty 0) parts from BOM variants prior to upload.
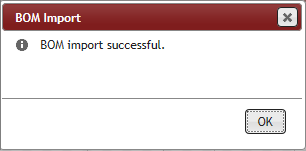
6.After the validation succeeds, click the Import button. A confirmation message displays to let you know the import was successful.

Import Success
To import a BOM from a design file
1.Open the design in Capture CIS and launch CIP.
2.Select the BOMs > View/Import > Import From Design ![]() button, that is located in the BOM Items section as shown in the screen image below.
button, that is located in the BOM Items section as shown in the screen image below.

Import From Design Button
3.Select the design from the Design file drop-down list. Then click the Import BOM button. The BOM in CIP updates with the new set of parts from the design.

Importing BOM Parts List from Design File
A confirmation message displays to let you know the import was successful.

Import Success
Note: When importing designs with variants, your design file must be opened within Capture CIS. All variants within the design file must match the variant names in CIP for Import From Design to automatically import parts for core design and variants.
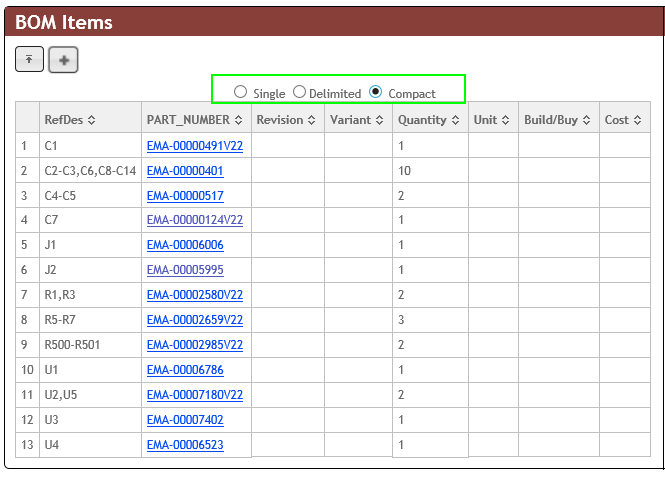
After import, you can view the BOM parts using one of three options: single, delimited or compact.
▪Single - Each reference designator is shown on a single line.
▪Delimited - Each part number is shown on a single line where reference designators are shown as a comma separated list.
▪Compact - Each part number is shown on a single line where reference designators are shown as ranges or a comma separated list.

Compact Part Formatting
Part attributes (e.g. description, schematic part, PCB footprint, etc) cannot be altered or added using the BOM import function, as they are tied to part numbers themselves.